Gluten Free Pie Crust Recipe
I love making pie crusts. It’s the first thing I really learned to bake and the whole process of making pies “fill my cup”. It is a practice of sorts, and defiantly something that you can get better at with practice! I’ve personally made this gluten free pie crust 100’s of times and heard from many of our loyal fans how much they love this recipe! Note that the recipe is for a single gluten free crust- you can certainly double the recipe for a double crust.
Be Gentle with your pie crust!
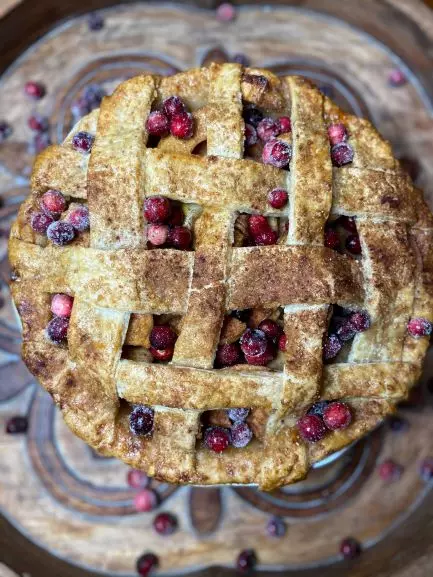
Gluten Free Pie Crusts are notoriously hard to roll out, this crust rolls out well. It’s sturdy enough but with a delicate bite, deliciously buttery and flaky. You can use all butter (my personal preference for taste) or part shortening (my preference for lattice tops) .Grating the butter is a great shortcut to making this recipe quickly. My go to method is to make this in my stand mixer. First, add the dry ingredients to the mixer. Second, just barely mix the grated butter in (less than 15 seconds mix time!) with a paddle attachement. Next, add the wet ingredients, and again, mix until just barely mixed together. An overworked pie crust is a tough pie crust and my biggest pie making tip is that we are not going for a perfect looking pie but a perfect TASTING pie.
Pie Making Tips!
- Don’t over mix the pie crust!
- Don’t over work (roll) the pie crust. Tip- Make sure that your rolling surface is well dusted with our Muffin and More mix.
- If the pie crust does not look perfect in your pie pan don’t worry! You’ll have some extra crust to patch areas if you need to. Just use your finger or a pastry brush dipped in a little water to “seal” your pie crust patch and no one will know the difference.
- The crust will seem too wet at first, however gluten-free flour tends to be thirsty and will absorb some of the liquid during the refrigeration time.
Enjoy 🫶 Josie
This recipe was adapted from Pie by Ken Haedrich which is a must-read for pie enthusiasts. Made with Josie’s Best Gluten Free Muffin and More Mix.
Ingredients
- 1 1/2 cups Josie’s Best Gluten Free Muffin & More mix
- 1 1/2 tsp sugar
- 1/2 tsp salt
- 1/2 cup unsalted butter or shortening, slightly frozen (or a least very cold)
- 1 egg yolk
- 1/2 tsp apple cider vinegar
- 1/2 cup cold waterNote: The egg creates a rich, flakey and sturdy crust. If you would like to make this without egg, the crust still will work, all you need to do is sub the egg with 2 TBS of water.Also, if you’re doing a lattice top – we recommend using 1/4 butter and 1/4 shortening.
Note that the recipe is for a single gluten free crust- you can certainly double the recipe for a double crust.
Instructions
In a medium bowl, mix the dry ingredients. Grate (yes, grate like cheese) the butter into the dry mixture. Gently work the butter in using your fingers or a pastry blender, until incorporated with some chunks of butter remaining.
Add the egg yolk to a small bowl, and add the vinegar and cold water. Mix well. Drizzle two-thirds of the wet mixture over the dry mixture and mix with a fork until just barely incorporated.
Gently form in a ball and place on plastic wrap. The dough should be wet and fairly sticky and form easily into a ball. If not, add the rest of the liquid mixture.
Gently press into a disc and wrap tightly with plastic wrap.
Refrigerate for about 1 hour. If the crust has been refrigerated for longer than one 1 hour, allow to warm slightly on the counter before rolling out.
When ready to roll out, place a large piece of parchment paper down first. Lightly dust parchment with Muffin and More mix. Place pie crust on the parchment, lightly dust with more mix and then top with an additional piece of parchment paper.
Gently roll out dough to the desired size.
Remove top layer of parchment and place pie tin (upside down) on top of rolled out the crust. You are then going to gently flip the pie crust over so it ends up in your pie tin. I like to slide mine off of the counter, using the parchment, so I can get my hand under it and ease it into the pie tin.
Once the crust is in the pie tin allow it to settle into the tin and very gently remove the top parchment layer.
Bake your pie as you usually would and enjoy it!
Oh.my.word.. never did I think I would enjoy pie again… but following this recipe, I’m in Pie Heaven! Thank you Josie!!!!
I have made this 3 or so times now, and have come to realize, this recipe is not for a two crust pie, as shown, but a single crust pie, so needs to be doubled for most pies. Maybe it says this, but I keep missing it.


Hi Mary,
The recipe does show that it is for a single pie crust in the servings section. However; we will up date the recipe to make that more clear. Thanks for reaching out and enjoy your pie 🙂